With over 7,000 mountainous islands in the Philippines, hiker-wannabe like us has a lot of choices to choose from! But then again, are we ready?
Hiking can be a little intimidating outdoor activity. But with right preparation, you can ace your first hiking too!
Let me share how can you prepare and enjoy your first.
Preparation
Do an extensive research about the mountain. Know its terrain and difficulty level. There are many Pinoy blogs out there dedicated to mountain climbing that can help you. But I am strongly suggesting you to check out Pinoy Mountaineer.
The Pinoy Mountaineer website is a comprehensive blog about hiking in the Philippines created by Gideon Lasco. This site contains detailed itineraries, tips, and other special concerns in climbing. Majority of mountaineers check this website for information and updates on the mountains that they plan to climb.
Anticipate the level of difficulty and train accordingly. For beginners, difficulty level from 1 to 3 is the best start.
See the suggested mountains per difficulty.
- A week before your climb you can do brisk walking or jogging for 30 – 60 mins a day.
- Two days before, you must check the weather forecast. Weather.com is one of the most accurate websites in providing weather related updates.
- Night before, sleep early and at least 8 hrs! You’ll need this rest and energy for the upcoming activity.
What to wear
I am highly suggesting you should wear something comfy and will let you move around easily and flexibly.

– Top –
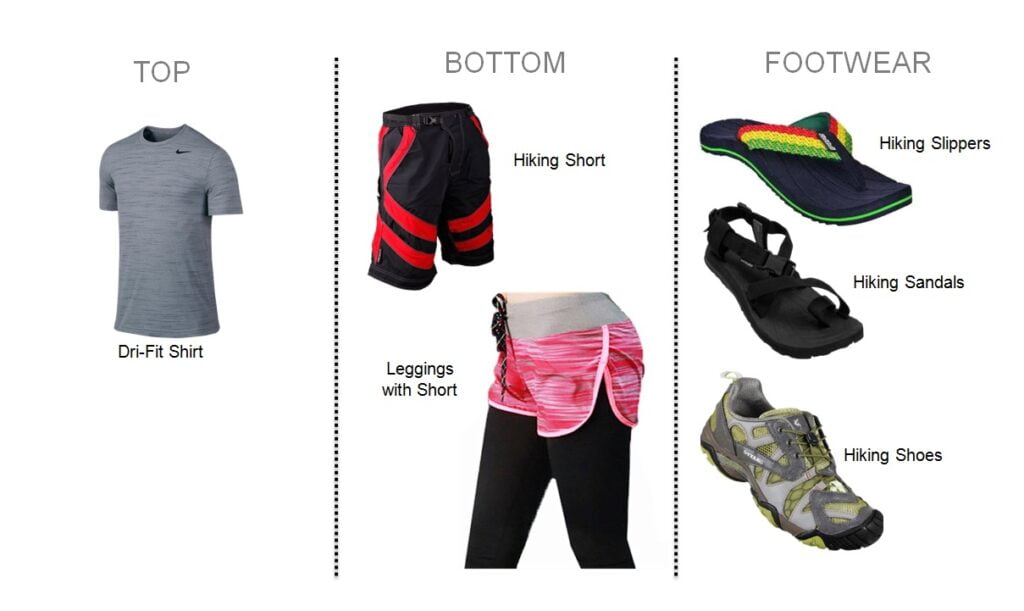
Dri-Fit wear is the top recommendation for this activity. This will absorb all your sweat and will give you a cooler feeling because the material evaporates the moisture. Avoid wearing cotton shirts because too much water will make it too damp and heavy.
– Bottom –
Most of the Filipino girl hikers wear leggings to give them better flexibility and top it with shorts to conceal their private parts. For boys, hiking shorts is the most recommended because this gives better flexibility vs cargo pants, maong pants, or basketball shorts.
Most of the Filipino girl hikers wear leggings to give them better flexibility and top it with shorts to conceal their private parts. For boys, hiking shorts is the most recommended because this gives better flexibility vs cargo pants, maong pants, or basketball shorts.
– Footwear –
For minor climbs, you can use trekking slippers or sandals. But for major ones, a trekking shoes or boots is a good investment. If you don’t want to splurge that much, local brands like Sandugo and Tribu are your best choices.
What to pack
– Required Items –

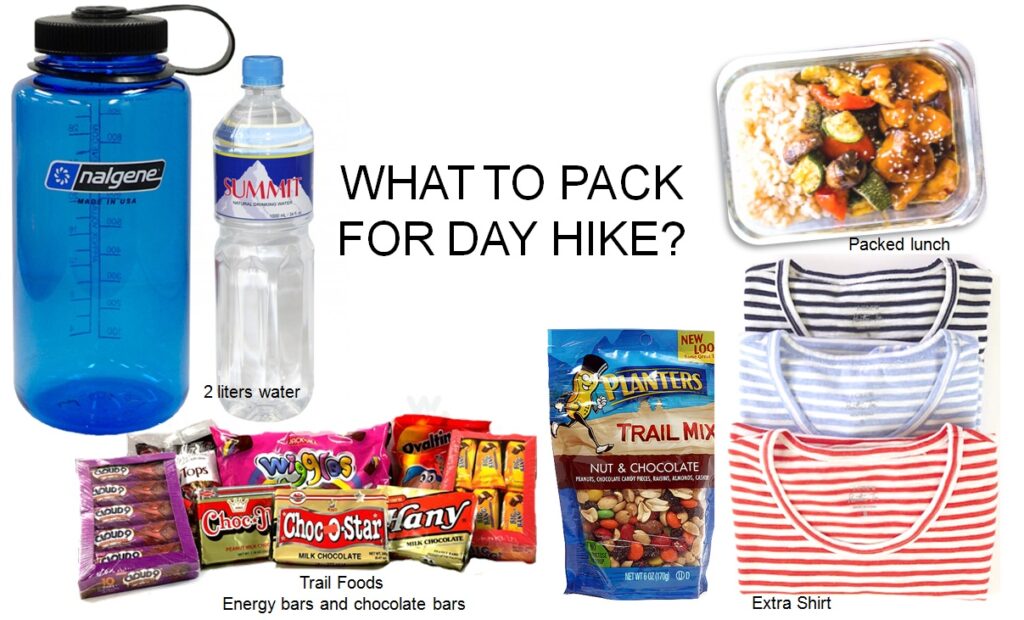
Water! 2 to 3 liters is good for minor climbs
Trail Foods – Energy bars and chocolate bars will help you get recharged if you are feeling tired. Avoid junk foods like chips with high salt contents as this will only make you more thirsty.
Packed lunch – It depends on your lunch preference. Usually, Filipino prepares rice and tasty dishes. Dee says, Adobo is their favorite pick. Other dishes we recommend are anything fried and canned goods. Avoid the dishes cooked with tomato sauce and gata/coco milk.
Adobo is a Filipino food cooked with soy sauce and vinegar. The vinegar component of this dish made it less lightly to get spoiled.
Extra clothes – Of course, after the tiresome activity it’s refreshing to wear new clothes when you go home
– Not required items but good to have for ‘just in case’ scenarios –

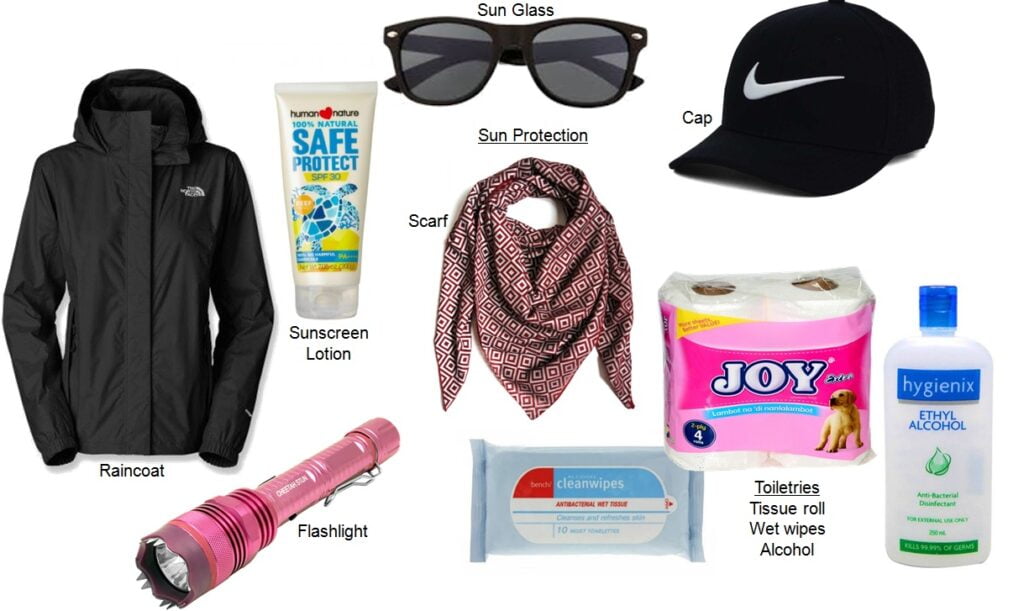
Flashlight or head lamps – ‘Just in case’ your trek gets delayed. Mountains don’t have a stable light source aside from the moon above. A handy flash light and head lamp will help you get through. These will serve as good light sources as you finish your trek. Dee prefers a non-rechargeable headlamp.
- headlamps will keep your hands free
- if the battery is already running out, you can simply replace it with new one. Not unlike with a rechargeable headlamp, its battery is bulit in and once it run out, you’ll be trekking in dark.
Sun protection – Dee does not mind getting darker but I do! Haha! So I applied sunblock before the climb. Other protection you can use are: shades, cap and scarf. Umbrella will also give you a better protection to sun. But, this is discouraged since its windy up there and umbrella can easily be blown away.
Rain protection – Dee does not mind getting wet too, and of course, I do. Rain coat is the best tool for rain protection. Dee says, it’s okay to be soaked for as long as your things are in water proof condition. Bags has rain cover. You can also put your things in plastic or zip lock.
Toiletries – There are modest comfort rooms at the jump off area. Other than that, if you have to relieve yourself during your trek, you have to do it on few meters away from the trail. Tissue roll, wet wipes and alcohol will help you clean yourself.
Personal Medications – ‘Just in case’ you need to drink certain medicines.
Now you are ready for your climb! I’m so proud of you to get this far. Don’t forget that on the day…
- Start early.
- Follow your itinerary.
- Stretching is important as you start your trek. This will prevent muscle aches.
- Remember: Leave no trace.Kill nothing but time; Leave nothing but footprints; Take nothing but pictures
- When you pass by someone, specially local villagers, greet them.
- Last but not the least – Enjoy!
Want to know my first hiking experience? or my other hiking escapades?
I also love to hear your first hiking experience! Feel free to leave a comment below.


Leave a Reply